|
Heater Core Replacement Information Audi 100/200 The 1989-91 Audi 100/200 Bentley Repair Manual information should be consulted before you attempt to remove the heater box from the vehicle. Inside the car, lower dashboard area: Disconnect the bundled junction of colored vacuum lines from the heater box servos. Pull back the wide center rubber boot from the blower housing that
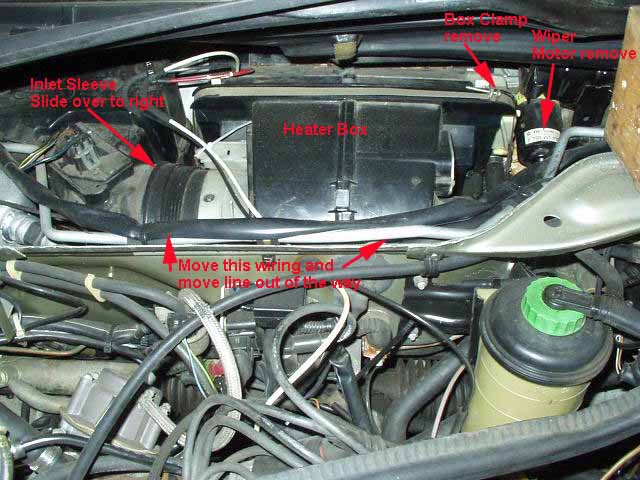
connects to the floor ducting. From under the hood behind the engine near the bottom of the windshield: Remove windshield wiper arms, and the plenum plastic cover with front rubber seal.
Slide the black plastic inlet ring to the right side into the blower
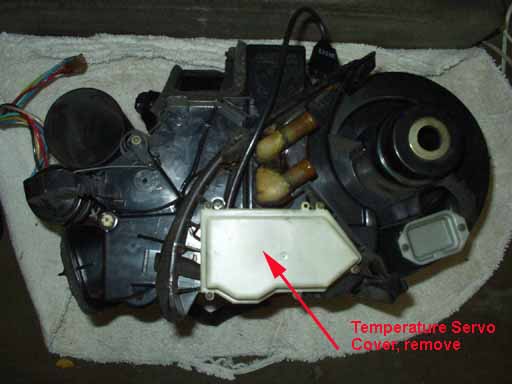
housing white inlet. Disconnect the 2 pin blower motor connector, and the temperature servo
connector near the white cover. Remove the white and black plastic vacuum lines, also remove the heater/blower
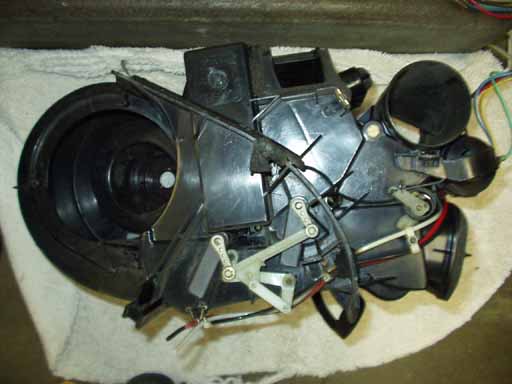
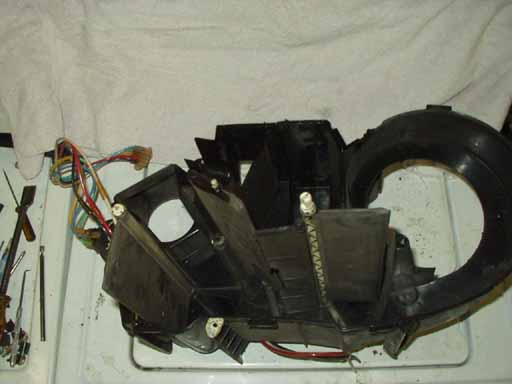
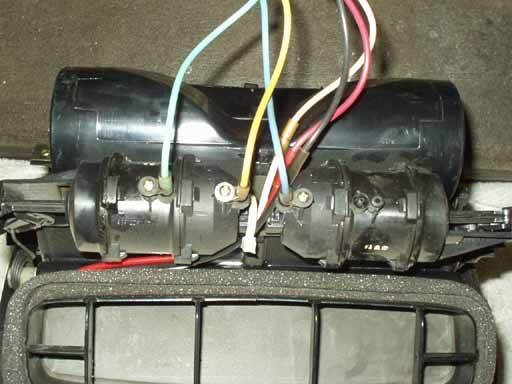
housing mounting strap philips screw, remove both strap pieces. There is a large foam gasket that seals the blower housing to the firewall and this gasket can stick to the firewall and make getting the blower housing pulled up very tough. Once the entire housing is pulled up high enough, the blower motor can be removed by taking out the 3 Philips screws that hold the white inlet ring that directs air into the blower motor. The C circlip that retains the blower motor end can be removed and the blower motor can be withdrawn out of the housing. Photo below shows the heater box with the blower removed.
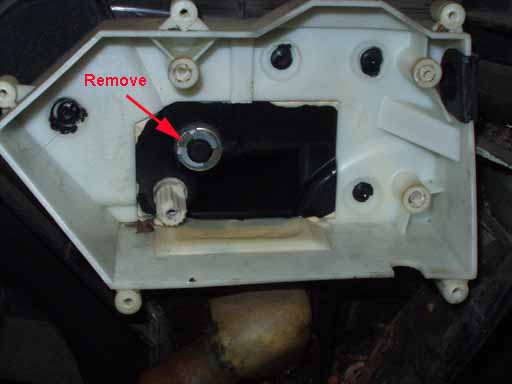
Remove the 5 screws holding the white cover, remove the screws holding the temperature servo and the one screw at the end of the linkage, remove the servo with linkage attached, then remove the C clip and washer underneath.
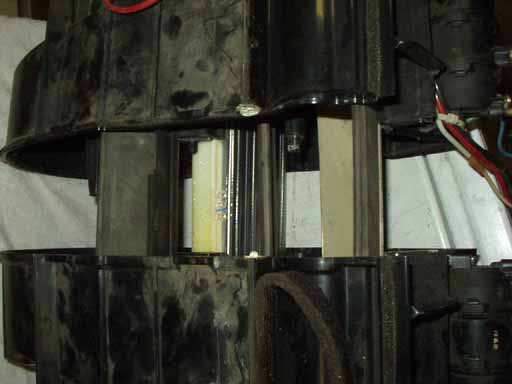
To split open the heater box, you must remove several phillips screws, some hidden deep down holes on each side, also remove all the metal clips around the box. If the 2 halves don't come apart easily, you must have missed one or more screws holding it together or one of the metal clips. Photo below show the box open, passenger side piece with air deflector flaps.
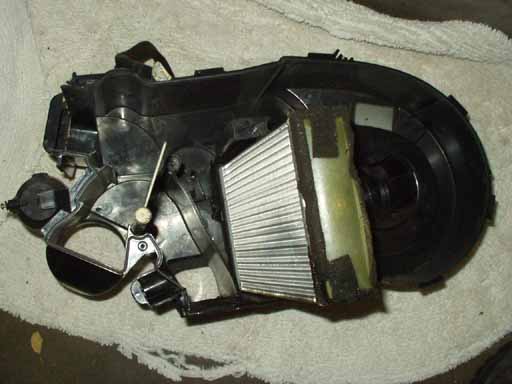
Heater box open showing the heater core (driver side section). The heater core usually has silicone sealer that has to be dug out and removed around the coolant fittings in order to remove the old core from the box.
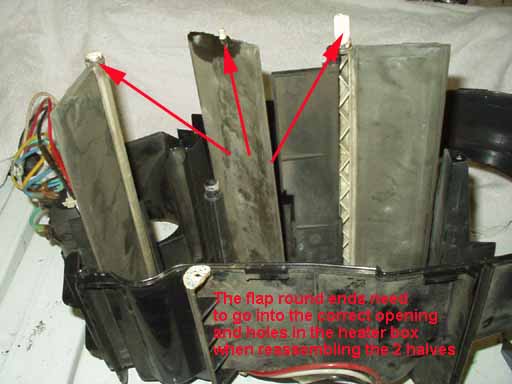
Go slow and pay attention to the flap round ends to ensure they get positioned into the flap operating slots and finally into the other end of the heater box when assembling the 2 halves of the heater box.
Heater Box going back together, go slow. After installing the new heater core and reassembling the heater box, installing all the metal clips and phillips screws, use silicone sealer to seal the area around the heater core coolant fittings.
When you put the blower housing back down into the car you may want to have a helper go inside the car and make sure the wide center rubber ductwork boot gets correctly positioned back onto the blower housing. Use some silicone lube on the rubber boot to allow it to slip into place.
Additional photos, Vacuum line connections
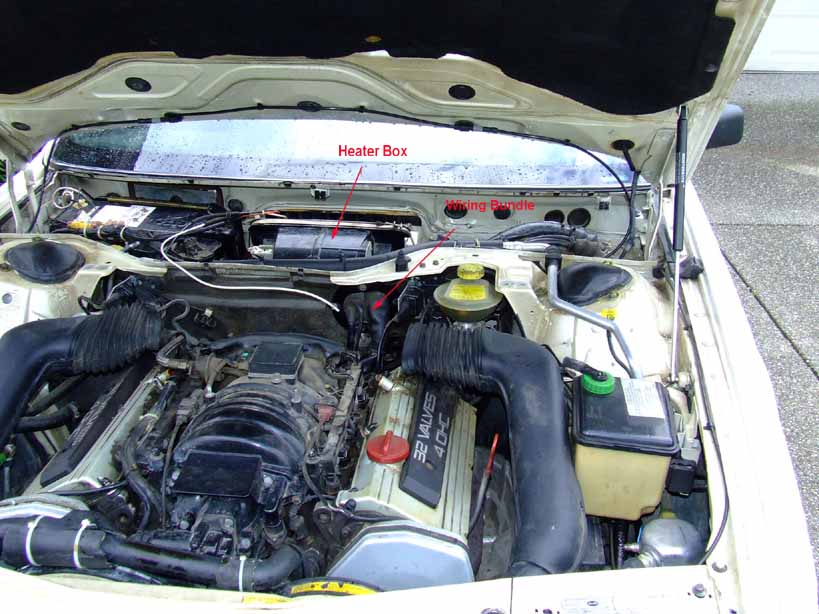
Audi V8 Photos. Heater
box shown after removing wiper arms, plastic plenum cover, and wiper
motor assembly.
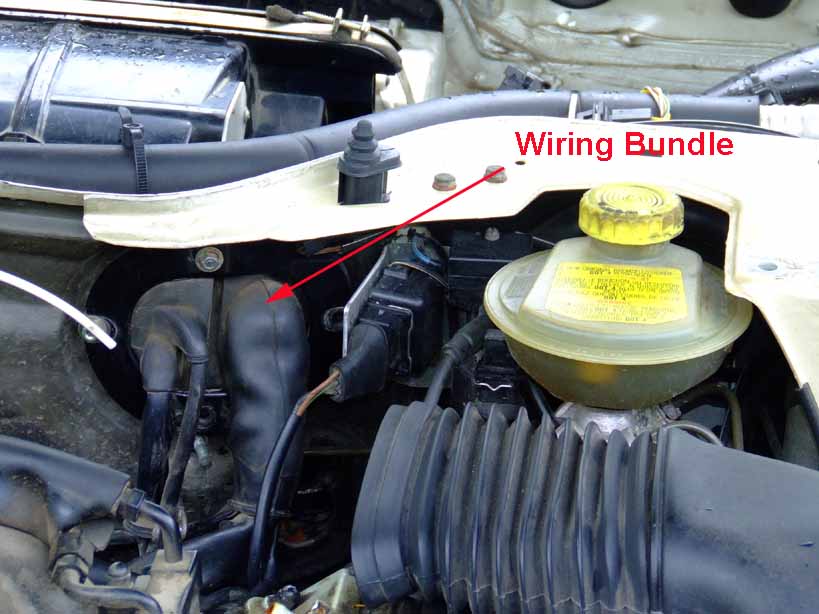
Wiring bundle retention plate may need to be removed to allow moving wiring harness out of the way during the heater box removal.
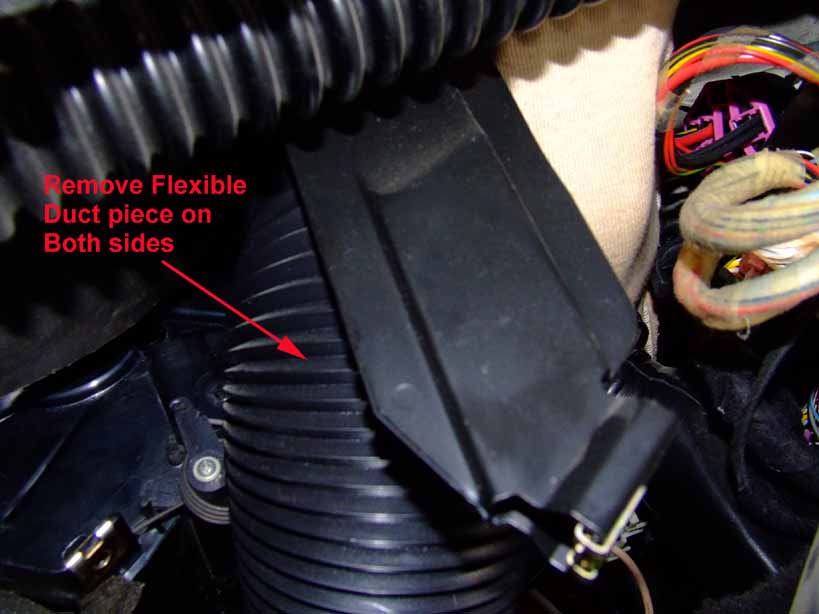
Inside the vehicle under the dash on the left and right sides remove the flexible duct section connecting heater box to dash vents.
Go to ECU System Technical Tips Copyright © SJM Autotechnik™ , all rights reserved Return to Troubleshooting Tips page. Return to SJM Autotechnik™ main page. |
| About Us Privacy Policy Terms of Use Links Customer Service Safety Information Home |